TM-9-2330-227-14-P - Page 114 of 576
TM 9-2330-227-14&P
LIGHT SWITCHES, 24-AND 11O-VOLT - CONTINUED
ACTION
LOCATION
ITEM
REMARKS
REMOVAL – CONTINUED
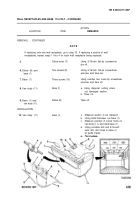
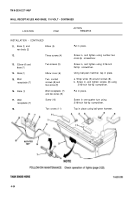
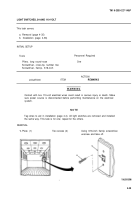
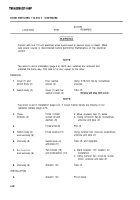
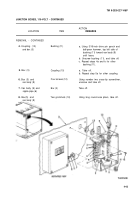
2. Box (1)
3. Switch (3)
and box (1)
4. Box (1)
Plate (2)
Take off.
Two screws (4)
Using 3/16-inch flat-tip screwdriver,
unscrew and take off.
Switch (3) and
Pull out from box.
three wires (5)
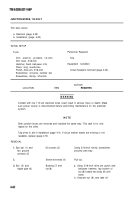
NOTE
Tag wires to aid in installation (page 4-4). If circuit marker bands are missing or not
readable, replace (page 4-73).
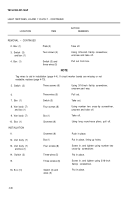
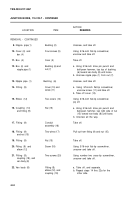
5. Switch (3)
Three screws (6)
Using 3/16-inch flat-tip screwdriver,
unscrew part way.
6.
Three wires (5)
Pull out.
7. Box (1)
Switch (3)
Take out.
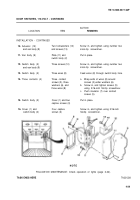
8. Van body (7)
Four screws (8)
Using number two cross-tip screwdriver,
and box (1)
unscrew and take off.
9. Van body (7)
Box (1)
Take off.
10. Box (1)
Grommet (9)
Using long round-nose pliers, pull off.
INSTALLATION
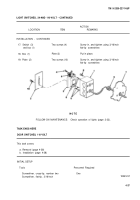
11.
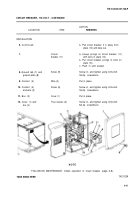
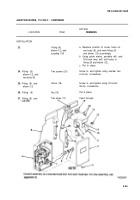
12. Van body (7)
13. Van body (7)
and box (1)
14. Switch (3)
15.
16.
B
OX
(1)
Grommet (9)
Box (1)
Four screws (8)
Push in place.
Put in place, lining up holes.
Screw in, and tighten using number two
cross-tip screwdriver.
Three wires (5)
Three screws (6)
Put in place.
Screw in, and tighten using 3/16-inch
flat-tip screwdriver.
Switch (3) and
wires (5)
Put in place.
4-36
Back to Top

