TM-9-2815-200-35
ENGINE, WITH CONTAINER:TURBOSUPERCHARGED, DIESEL ,FUEL INJECTION ,90-DEGREE “V” TYPE, AIR - COOLED ,12 - CYLINDER , ASSEMBLY ;MODELS AVDS-1790-2M (2815-856-4996), AVDS-1790-2A AND AVDS-1790-2AM (2815-856-9005)
TECHNICAL MANUAL; DIRECT SUPPORT, GENERAL SUPPORT AND DEPOT MAINTENANCE MANUAL INCLUDING REPAIR PARTS AND SPECIAL TOOLS LISTS
TM-9-2815-200-35 - Page 258 of 779
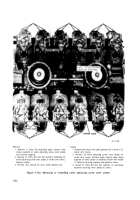
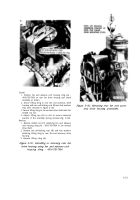
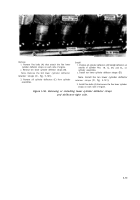
Remove
1. Remove nine self-locking nuts (A) and flat washers
attaching accessory drive housing to rear fan and ac-
cessory drive housing mounting base.
2. Remove five self-locking nuts (B) and flat washers
attaching rear fan drive housing to mounting base.
Install
1. Install five self-locking nuts (B) and flat washers
securing rear fan drive housing to rear fan and ac-
cessory drive housing mounting base.
2. Install nine self-locking nuts (A) and flat washers
securing rear fan drive housing to mounting base.
Figure 5-129. Removing or installing
attaching parts for rear fan and accessory
drive housing assemblies-right side.
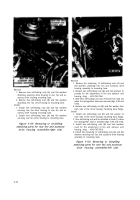
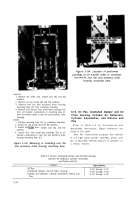
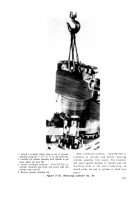
Remove
1. Remove the remaining 12 self-locking nuts (A) and
flat washers attaching rear fan and accessory drive
housing assembly to mounting base.
2. Remove two self-locking nuts (B) and lock washers to
provide for the attachment of fan and advance unit
housing sling - 4910-795-7954.
3. Note that self-locking nut was removed from stud (C)
when fire extinguisher tube was removed (figs. 5-89 and
5-90).
4. Remove one self-locking nut (D) and flat washer from
each side of the drive housing mounting base flange.
Install
1. Install one self-locking nut (D) and flat washer on
each side of the drive housing mounting base flange.
2. One self-locking nut will be installed at stud (C) when
fire extinguisher tube is installed (figs. 5-89 and 5-90).
3. Install two self-locking nuts (B) and lock washers
used for the attachment of fan and advance unit
housing sling - 4910-795-7954.
4. Install the remaining 12 self-locking nuts (A) and flat
washers securing rear fan and accessory drive housing
assembly to mounting base.
Figure 5-130. Removing or installing
attaching parts for rear fan and accessory
drive housing assemblies-left side.
5-72
Back to Top

