TM-9-2815-205-24 - Page 569 of 856
INSPECTION-ACCEPTANCE AND REJECTION CRITERIA - Continued
14.
Needle valve:
Check spray tip needle valve for erosion at seat shoulder, scratches, and overheating.
15.
Needle valve lift.
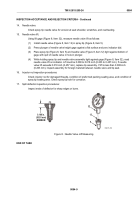
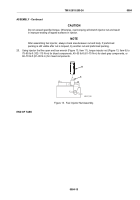
Using lift gage (Figure 8, Item 32), measure needle valve lift as follows:
(1)
Install needle valve (Figure 8, Item 12) in spray tip (Figure 8, Item 5).
(2)
Press plunger of needle valve height gage against a flat surface and zero indicator dial.
(3)
Place spray tip (Figure 8, Item 5) and needle valve (Figure 8, Item 12) tight against bottom of
gage with quill of needle valve in hole in plunger.
(4)
While holding spray tip and needle valve assembly tight against gage (Figure 8, Item 32), read
needle valve lift on indicator. Lift must be 0.008 to 0.018 inch (0.203 to 0.457 mm). If needle
valve lift exceeds 0.018 inch (0.457 mm), replace tip assembly. If lift is less than 0.008 inch
(0.203 mm), inspect assembly for foreign material between needle valve and tip seat.
16.
Injector nut inspection procedures:
Check injector nut for damaged threads, condition of preformed packing seating area, and condition of
spray tip seating area. Check spray tip hole for corrosion.
17.
Spill deflector inspection procedures:
Inspect ends of deflector for sharp edges or burrs.
5
12
32
0.199 in.
(50.55 mm)
MINIMUM
MAINT_282
Figure 8.
Needle Valve Lift Measuring.
END OF TASK
TM 9-2815-205-24
0084
0084-9
Back to Top

