TM-9-2815-205-24 - Page 586 of 856
DISASSEMBLY - Continued
CAUTION
Handle blower end plates, rotors, and blower housing with care during disassembly to
ensure no damage to mating surfaces.
12.
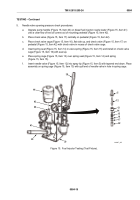
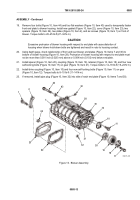
Tap front end plate (Figure 3, Item 7) off of dowel pins and away from blower housing (Figure 3, Item 28)
with a soft head hammer. Remove end plate.
13.
Withdraw right rotor (Figure 3, Item 9) and left rotor (Figure 3, Item 8) from front of blower housing
(Figure 3, Item 28).
14.
On models 5063-5392, 5063-5393, and 5063-539L, remove two screws (Figure 3, Item 31) retaining rear
end plate (Figure 3, Item 30) to blower housing (Figure 3, Item 28).
15.
Tap rear end plate (Figure 3, Item 30) off of dowel pins and away from blower housing (Figure 3, Item 28)
with a soft head hammer. Remove end plate.
16.
Remove two seals (Figure 3, Item 29) from each end plate (Figure 3, Items 7 and 30). Discard seals.
17.
If necessary, remove pipe plugs (Figure 3, Item 32) from both front and rear end plates
(Figure 3, Items 7 and 30).
7
8
9
28
29
30
31
32
29
29
29
32
MAINT_292
Figure 3.
Blower Rotor Removal.
TM 9-2815-205-24
0085
0085-4
Back to Top


