TM-9-2815-210-34-2-2 - Page 66 of 968
TM 9-2815-210-34-2-2
FRAME 3 0
1.
2.
3.
4.
5.
6.
7.
NOTE
Readings must be within limits given in table 4-10. The
letter L shows a loose fit and the letter T shows a tight
fit. If readings are not within given limits, throw away
part and get a new one.
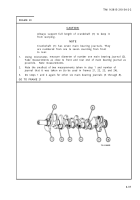
There are six main bearing journals on crankshaft. They
are called by numbers one to six, counting from front to
rear of crankshaft.
The number four main bearing journal
(3) is also called the main thrust bearing journal.
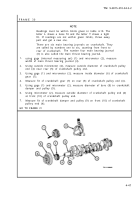
using gage (internal measuring set) (1) and micrometer (2), measure
width of main thrust bearing journal (3).
Using outside micrometer (2), measure outside diameter of crankshaft pulley
end (4) near rear (5) of crankshaft pulley end.
Using gage (1) and micrometer (2), measure inside diameter (6) of crankshaft
gear (7).
Measure fit of crankshaft gear (7) on rear (5) of crankshaft pulley end (4).
Using gage (1) and micrometer (2), measure diameter of bore (8) in crankshaft
damper and pulley (9).
Using micrometer (2), measure outside diameter of crankshaft pulley end (4)
at front (10) of crankshaft pulley end.
Measure fit of crankshaft damper and pulley (9) on front (10) of crankshaft
pulley end (4).
GO TO FRAME 31
4-47
Back to Top

