TM-5-2350-378-24-P - Page 559 of 790
TM 5--2350--378--24&P
0029 00--4
REPLACE WIRING HARNESS W2 -- Continued
0029 00
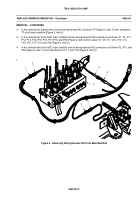
REMOVAL -- CONTINUED
5.
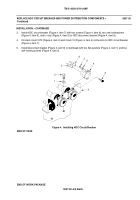
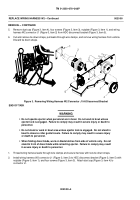
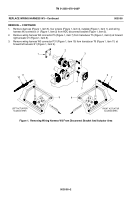
Remove dust cap (Figure 3, item 4), four screws (Figure 3, item 3), nutplate (Figure 3, item 1), and wiring
harness W2 connector J1 (Figure 3, item 2) from HDC disconnect bracket (Figure 3, item 5).
6.
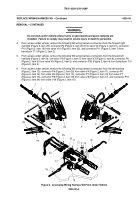
Cut and remove tie down straps, pull leads through wire clamps, and remove wiring harness from vehicle.
Discard tie down straps.
Figure 3. Removing Wiring Harness W2 Connector J1 At Disconnect Bracket
END OF TASK
WARNING
S
Do not operate ejector when personnel are in bowl. Do not work in bowl unless
ejector lock is engaged. Failure to comply may result in severe injury or death to
personnel.
S
Do not stand or work in bowl area unless ejector lock is engaged. Do not stand in
bowl to observe roller guide travels. Failure to comply may result in severe injury
or death to personnel.
S
When folding dozer blade, work on blade latches from side of vehicle only. Do not
stand In front of dozer blade while retracting ejector. Failure to comply may result
in severe injury or death to personnel.
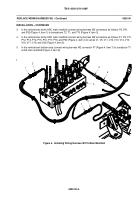
1.
Thread wiring harness leads through wire clamps and secure harness with new tie down straps.
2.
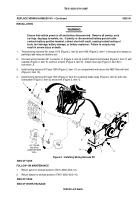
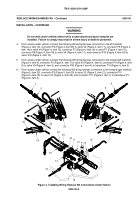
Install wiring harness W2 connector J1 (Figure 3, item 2) to HDC disconnect bracket (Figure 3, item 5) with
nutplate (Figure 3, item 1), and four screws (Figure 3, item 3). Attach dust cap (Figure 3, item 4) to
connector J1.
Back to Top


