TM-9-2320-273-34 - Page 532 of 801
TM 9-2320-273-34
(11)
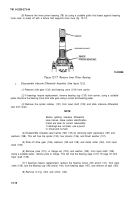
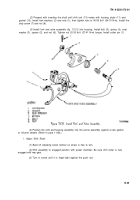
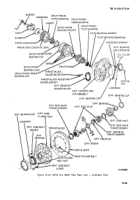
Using a chain fall, carefully lower the new input shaft assembly into the carrier.
(12)
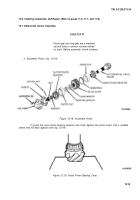
Install the new O-ring (143) in groove in the input bearing cage pilot outside diameter.
Applying axle lubricant to O-ring will facilitate installation. Install new oil seal (150) into bearing
cage (147).
(13)
Place the input bearing cage (147) and cup (146) into position over the shaft against the
input bearing cone (145). Continue by adjusting input shaft endplay as described in paragraph
i.
i. Adjust Input Shaft Endplay.
(1)
Install the bearing cage-to-carrier capscrews and tighten to fingertight only. As capscrews
are tightened, rotate the input shaft several revolutions to seat bearings. Keep the hypoid ring gear from
rotating by blocking gear with wood wedge.
NOTE
In step
(2),
use a minimum of three
shims in the pack with the thinnest
shims positioned at both sides to
allow pack to compress for sealing.
(2)
Using a feeler gage, measure the gap between the bearing cage and machined carrier face.
Add 0.003 in. to the gap measurement (0.003 in. + gap measurement) and select a new shim pack to
correspond to this value.
(3)
Remove the cage capscrews and lift the input assembly slightly, using a chain fall.
NOTE
The shims in step
(4)
may be split.
With split shims it is not necessary
to completely remove the cage or
input shaft assembly from carrier
to install shim pack.
(4)
Slide the shim pack into position under the bearing cage and lower the input shaft
assembly and cage back into carrier.
(5)
Secure the cage-to-carrier with two capscrews and Iockwashers positioned in opposite
holes. Tighten capscrews to 40-55 Ib-ft (54-75 N·m) torque. As capscrews are tightened, rotate the in-
put shaft several revolutions to seat bearings.
NOTE
In step
(6)
the use of a magnetic base
will facilitate mounting the indicator.
(6)
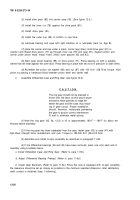
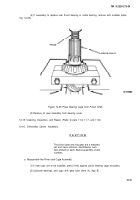
Mount a dial indicator onto the front face of carrier with the pointer (plunger) seated
against the end of the input shaft. Turn the input shaft in both directions while pushing inward. Set the
dial indicator to zero.
(7)
While observing the dial indicator, pull the input shaft outward and take note of the
reading. Final endplay must be 0.003-0.()()7 in. If endplay is not within correct range, adjust shim pack
by adding or removing shims as required.
12-22
Back to Top

