TM-9-2330-356-14
SEMITRAILER, TANK: 5000 GALLON, BULK HAUL, SELF LOAD/UNLOAD M967 AND M967A1; SEMITRAILER, TANK: 5000 GALLON, FUEL DISPENSING, AUTOMOTIVE M969 AND M969A1; SEMITRAILER, TANK: 5000 GALLON, FUEL DISPENSING, UNDER/OVERWING AIRCRAFT M970 AND M970A1
TECHNICAL MANUAL; OPERATOR’S, UNIT, DIRECT SUPPORT, AND GENERAL SUPPORT MAINTENANCE MANUAL
OCTOBER 1990
TM-9-2330-356-14 - Page 377 of 528
TM 9-2330-356-14
e.
Remove rocker arm cover and gasket (para 7-29).
f
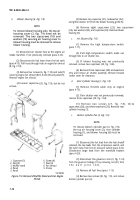
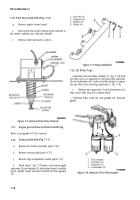
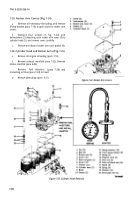
Remove the two baffles (34, fig. 7-9) by removing
capscrew (32) and washer (33).
g.
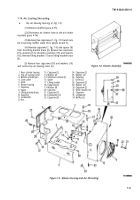
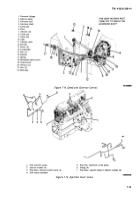
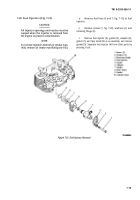
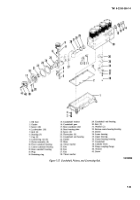
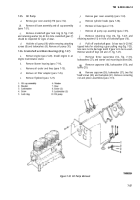
Remove stand pipe vent (20, fig. 7-25).
h.
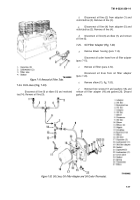
Remove reeker arms by removing self-locking
arm nuts (1, fig. 7-25) and reeker arm balls (2) on each
rocker arm (3). Lift reeker arm (3) off.
i.
Remove five capscrews (4), push rod guide plate
(5), six screws (6), and washers (7) holding each cylinder
head (8) to cylinder block (9).
j.
Remove push rod (15) and remove cylinder heads.
If heads stick, rap sharply with a soft hammer. Do not use a
pry. Do not strike cooling fins.
k.
Remove push rod shields (17) and seals (16),
spring (18), washers (19), and tappets (20).
l.
Remove cylinder head gaskets (10).
7-31.
Piston and Connecting Rod
a.
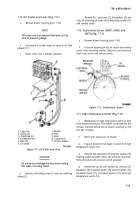
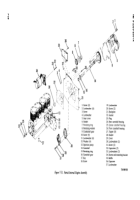
General (Fig. 7-26).
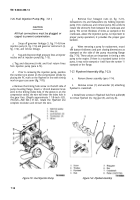
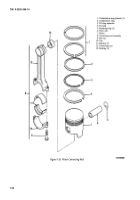
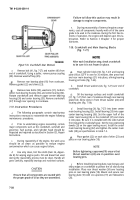
(1) Each piston (7) is fitted with three
compression rings and an oil control ring (4).
(2) Full floating piston pins (6) connect the piston
to the connecting rod (12). The pins are held in place with
a retaining ring (5) at each end.
(3) The lower end of each connecting rod
contains half-shell, precision bearings (11), and the upper
end contains reamed bushings (13).
b.
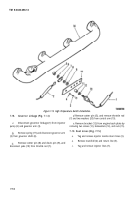
Removal (Fig. 7-27).
NOTE
The connecting rod and cap are stamped
for Installation in the proper cylinder. When
removing piston assemblies, check the
marking so each piston can be Installed in
the proper cylinder.
When using some maintenance stands, the
engine starter and air shutter assembly
may have to be removed before attaching
engine.
(1) Remove engine from engine mounting frame
(para 5-20) and attach to an engine maintenance stand, if
not done previously.
(2) Drain crankcase oil (para 4-71).
(3) Remove cylinder heads (para 7-30).
NOTE
Do not set the cylinder assembly upright until
after removal of the oil pump pick-up cup
assembly, camshaft, and valve tappets
described In the following paragraphs.
(4) Turn cylinder block and oil base on its side.
CAUTION
Do not attempt to pry the oil base free of the
cylinder block assembly. If necessary, use a
soft mallet to separate the oil base.
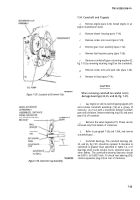
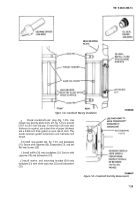
(5) Remove ten capserews (3, fig. 7-27) and
lockwashers (4) and remove the oil base (1) from cylinder
block (38).
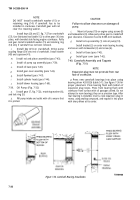
(6) Remove screws (4, fig. 7-32), lockwasher (3),
and bracket (2), and remove oil cup assembly (1).
(7) Remove ridge from cylinder bore with a ridge
reamer before removing piston.
(8) Remove bolts (5, fig. 7-27), cap (7), and two
bearings (6) from each connecting rod (8). Push piston
assembly (9) upward through top of cylinder bore with a
soft wooden tool to prevent rod bearing damage. If piston
assembly cannot be removed, turn crankshaft to aline
connecting rod with the crankshaft.
(9) Loosely install cap (7) and bearings (6) on the
corresponding removed piston assembly to maintain
proper grouping.
7-21
Back to Top

