TM-9-1200-215-34-P - Page 134 of 266
TM 9–1200–215–34&P
4–20
4–19.
ELECTRICAL INDICATOR PANEL, LEDs DS1 AND DS2
DESCRIPTION
This task covers:
a.
Removal
b.
Installation
INITIAL SETUP
Tools:
Tool Kit, JTK–17LAL (item 34, Appendix E)
Tool Kit, General Mechanic’s (item 42, Appendix E)
Materials/Parts:
Adhesive/Sealant (item 3, Appendix D)
Cleaning Cloth (item 13, Appendix D)
Label (item 19, Appendix D)
Solder (item 28, Appendix D)
Soldering Flux (item 18, Appendix D)
Alcohol, Denatured (item 4, Appendix D)
Brush, Acid Swabbing (item 11, Appendix D)
Equipment Condition:
Electrical Indicator Panel removed; if not, remove the
Electrical Indicator Panel in accordance with para-
graph 4–18
Personnel Required:
One MOS 35Y
a.
REMOVAL
CAUTION
ESD SENSITIVE
•
The PDIU contains ESD sensitive
components.
Wear a protective
ESD wrist strap whenever handling
components.
Failure to comply may
result in damage to equipment.
•
Damage to RFI/EMI contact strip
may occur.
Do not slide cover off of
housing.
Pick cover straight up.
1.
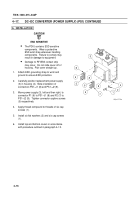
Attach ESD grounding strap to wrist and
ground to ensure ESD protection.
2.
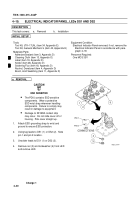
Using tag leads to DS1 (1) or DS2 (2).
Note
pin 1 and pin 2 location.
3.
Unsolder leads to DS1 (1) or DS2 (2).
4.
Remove nut (3) and lockwasher (4) from LED
and remove LED.
Change 1
5
2
3
1
PIN 1
PIN 2
LED
CONNECTIONS
4
Back to Top


