TM-9-2330-227-14-P - Page 134 of 576
TM 9-2330-227-14&P
4-56
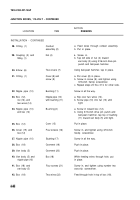
BLACKOUT STOPLIGHT ASSEMBLY - CONTINUED
ACTION
LOCATION
ITEM
REMARKS
REMOVAL - CONTINUED
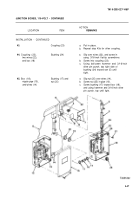
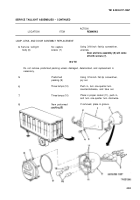
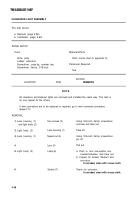
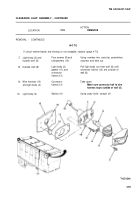
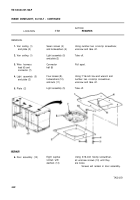
2.
Bracket (1)and
Screw (3) and
Using 1/2-inch socket and ratchet handle
blackout stoplight
Iockwasher (4)
with 3/8-inch drive, unscrew and take
assembly (2)
out.
3.
Bracket (1)
Blackout stoplight
Lift up, and take off.
assembly (2)
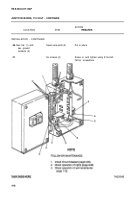
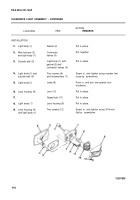
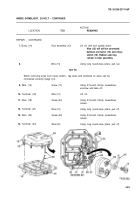
LAMP, LENS, AND DOOR ASSEMBLY REPLACEMENT
4.
Blackout stoplight
Two screws (6)
body (5)
5.
Door and lens
Gasket (8)
assembly (7)
6.
Blackout stoplight
Lamp (9)
body (5)
7.
Lamp (9)
8.
Door and lens
Gasket (8)
assembly (7)
9.
Blackout stoplight
Door and lens
body (5)
assembly (7)
10.
Two screws (6)
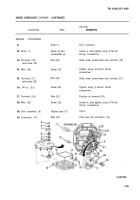
INSTALLATION
11.
Bracket (1)
12.
Wire harness
lead (12)
a. Using 3/16-inch flat-tip screwdriver,
unscrew and take out.
b. Using 3/16-inch flat-tip screwdriver,
pry off door and lens asembly (6).
Using 3/16-inch flat-tip screwdriver,
pry out.
Push in, turn one-quarter turn
counterclockwise, and take out.
Place in socket (10), push in, and turn
one-quarter turn clockwise.
Place in groove.
Place in position on blackout stoplight
body (2).
Screw in and tighten, using 3/16-inch
flat-tip screw driver.
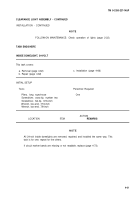
If only repairing lamp, lens or
door assembly, go to FOLLOW-ON
MAINTENANCE.
Blackout stoplight
Line up bracket stud (11) with small hole
assembly (2)
on blackout stoplight body, and place
onto bracket.
End connector (13)
Feed through frame hole (14), and push
into blackout light assembly body (2).
Back to Top

