TM-9-2330-356-14
SEMITRAILER, TANK: 5000 GALLON, BULK HAUL, SELF LOAD/UNLOAD M967 AND M967A1; SEMITRAILER, TANK: 5000 GALLON, FUEL DISPENSING, AUTOMOTIVE M969 AND M969A1; SEMITRAILER, TANK: 5000 GALLON, FUEL DISPENSING, UNDER/OVERWING AIRCRAFT M970 AND M970A1
TECHNICAL MANUAL; OPERATOR’S, UNIT, DIRECT SUPPORT, AND GENERAL SUPPORT MAINTENANCE MANUAL
OCTOBER 1990
TM-9-2330-356-14 - Page 414 of 528
TM 9-2330-356-14
(b)
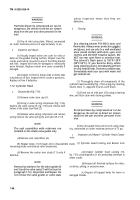
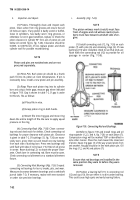
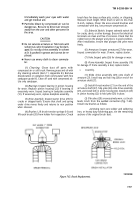
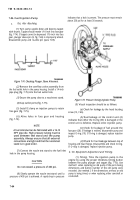
Position the new brush lead next to the
tinned sections of the original brush lead. Install and
crimp the brass strip connectors (included) around both
leads to hold the new brushes in place (fig. 7-63).
(c)
Solder the new brushes in place. Position
the brush leads so they do not contact the frame or
interfere with through bolt installation.
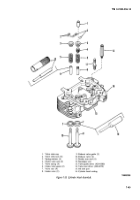
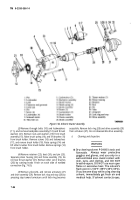
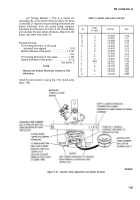
(4) Install brush assembly (15, fig. 7-62) and
brush washers (13) in frame assembly (19), and install
previously removed lockwasher and nut on stud of brush
assembly (15).
(5) Install brushes (15 and 20) in brush holder
(18). Attach brush holder (18) to frame assembly (19) with
screws (16) and lockwashers (17).
(6) Assemble armature (27), drive assembly (29),
and pinion housing (22) with frame assembly (19).
(7) Install brush springs (14).
(8) Install thrust washers (21) on the end of the
armature shaft (27) and install backplate assembly (12) on
the frame assembly (19) with through bolts (10) and
lockwashers (11).
(9) Install solenoid switch (9) on frame assembly
(19) with screws (7) and lockwashers (8) so that bottom
terminal of solenoid (9) goes through connector (4).
Attach terminal to connector with hardware on the
solenoid switch (9). Connect plunger of solenoid (9) and
yoke (26) with pin (6). Retain pin (6) with cotter pin (5).
Install boot (24) and retainer (23) over yoke (26). Check
that plunger and yoke move freely when solenoid switch is
securely fastened to starting motor.
(10) Connect tagged lead (3) between solenoid
switch (9) and brush assembly (15). Install nut (1) and
lockwasher (2). Remove tags.
7-79. Alternator (Fig. 7-64)
a.
Disassembly.
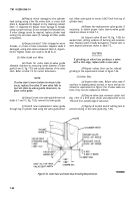
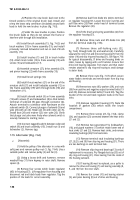
(1) Hold the pulley of the alternator in a vise with
soft jaws and remove pulley nut (1, fig. 7-64). Use a
suitable puller and remove pulley (2) and fan (3).
(2) Using a brass drift and hammer, remove
woodruff key (11) from keyway in rotor shaft. Remove
spacer (4).
(3) Remove four screws which fasten regulator
(43) in housing (37). Lift regulator from housing and
disconnect red and black leads from regulator. Tag the
position of the leads for correct assembly.
(4) Remove lead from diode trio (42) to terminal
on regulator housing (37). Loosen the inner nut (34) and
pull blue wire (35) from under head of terminal screw.
Remove the regulator (43).
(5) Lift the brush and spring assemblies (44) from
the regulator housing (37).
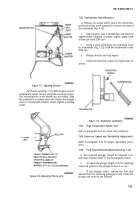
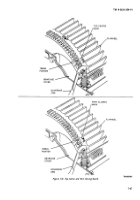
(6) Remove three nuts and lift diode trio (42)
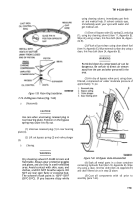
from AC terminal studs (fig. 7-65).
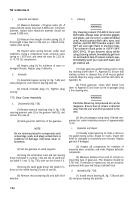
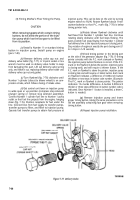
(7) Remove three self-locking nuts (32,
fig. 7-64), through bolts (5), and washers (6). Carefully
separate the rotor (12) and drive end housing (7) from the
stator (14) and slip ring end housing (31). See figure 7-66
for typical disassembly. If drive end housing binds on
stator, loosen by tapping with a soft hammer. Ensure that
drive end housing separates from stator and that stator
remains attached to slip ring end housing to avoid damage
to stator leads.
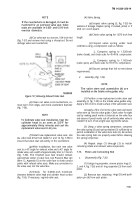
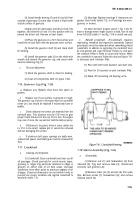
(8) Remove three nuts (fig. 7-67) which secure
stator leads to terminals and remove stator from slip ring
end housing.
(9) Remove two nuts (40), washers (39), and nuts
(38) from positive and negative output terminal bolts (19
and 20). Remove terminal bolts (19 and 20). Tag the
location of the red and black regulator leads on the heat
sinks.
(10) Remove regulator housing (37). Note the
location of gasket (36) which seals the brush
compartment.
(11) Remove three screws (23, fig. 7-64), clamp
(24), and capacitor (25) connected between the heat sinks
(21 and 22).
(12) Remove two capscrews (15), lockwashers
(16), and guard washers (17) which retain lower end of
heat sinks (21 and 22). Remove heat sinks, and remove
insulating bushings (26) from heat sinks.
(13) Remove terminal stud insulating bushings
(27, 28,29, and 30) from slip ring end housing (31). There
are two bushings in each terminal hole.
(14) Remove slip ring end bearing (13) only if
replacement is necessary. Pry flanged dust cap (33) out of
slip ring end housing (31). Press bearing from the inside of
the housing outward.
(15) If bearing (8) must be replaced, use a puller to
remove the drive end housing (7) and bearing assembly (8,
9, and 10) from the rotor shaft.
(16) Remove four screws (10) and bearing retainer
(9), and press bearing (8) out of drive end housing.
7-58
Back to Top

