TM-9-2330-356-14
SEMITRAILER, TANK: 5000 GALLON, BULK HAUL, SELF LOAD/UNLOAD M967 AND M967A1; SEMITRAILER, TANK: 5000 GALLON, FUEL DISPENSING, AUTOMOTIVE M969 AND M969A1; SEMITRAILER, TANK: 5000 GALLON, FUEL DISPENSING, UNDER/OVERWING AIRCRAFT M970 AND M970A1
TECHNICAL MANUAL; OPERATOR’S, UNIT, DIRECT SUPPORT, AND GENERAL SUPPORT MAINTENANCE MANUAL
OCTOBER 1990
TM-9-2330-356-14 - Page 410 of 528
TM 9-2330-356-14
c.
Inspection and Repair.
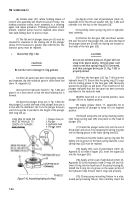
(1) Measure diameter of bypass valve
(3). If
measurement shows less than 0.3365-inch minimum
diameter, replace valve. Maximum diameter should not
exceed 0.3380-inch.
(2) Measure free length of valve spring (3). If
free length is less than 2.3125-inch (+/- 0.0625-inch),
replace valve spring.
(3) Inspect valve spring tension under load
conditions. Using a compression scale, compress valve
spring to 1.1875-inch, and check the scale for 2.225 lb.
(+ /-0.110 lb.) compression.
(4)
Inspect plug (1) for evidence of worn or
damaged threads. Replace plug if defective.
d.
Assembly.
(1) Assemble bypass spring (2, fig. 7-60) and
valve plunger (3), and install in bearing plate (4).
(2) Install recessed plug (1). Tighten plug
securely.
7-75. Gear Cover Assembly
a.
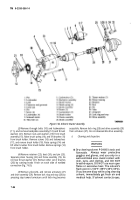
Disassembly (Fig.
7-28).
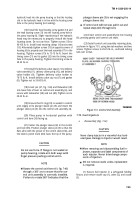
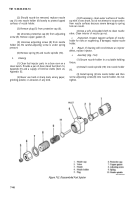
(1) Remove external retaining ring (1, fig. 7-28)
securing governor yoke (2) to the governor shaft (5), and
remove the yoke (2).
(2) Slide governor shaft free of the gearcase.
NOTE
Do not remove pressed-in components such
as bearings, seals, and plugs unless there is
evidence of damage, excessive wear or
looseness.
(3) Set the gearcase on wood supports.
(4) Using the combination main and cam bearing
driver tool (table 5-1 and fig. 7-36) and the oil seal driver
tool (table 5-1 and 13, fig. 7-28), drive out the oil seal (11).
(5) Using the valve guide driver tool (table 5-1),
drive out the needle bearing (7) and oil seal (6).
(6) Remove thrust bearing (8) and ball (9) if
defective.
b.
Cleaning.
WARNING
Dry cleaning solvent P-D-680 Is toxic and
flammable. Always wear protective goggles
and gloves, and use only in a well-ventilated
area. Avoid contact with skin, eyes, and
clothes, and DO NOT breathe vapors. DO
NOT use near open flame or excessive heat.
The solvent’s flash point is 100°F-138°F
(38°C-59°C). If you become dizzy while
using cleaning solvent, Immediately get fresh
air and medical help. If solvent contacts eyes,
Immediately wash your eyes with water and
get medical aid.
(1) Clean gearcase gasket mating surface using
dry cleaning solvent (item 11, Appendix E). Ensure that
mating surface is cleaned free of all excess gasket
material. Wipe dry using a clean, lint-free cloth (item 24,
Appendix E).
(2) Flush gearcase
clean with diesel fuel
(item 14, Appendix E) and clean out the oil passages using
a fine cleaning wire.
WARNING
Particles blown by compressed air can be
dangerous. Ensure that air stream is directed
away from the user and other personnel in the
area.
(3) Dry oil passages using clean, filtered com-
pressed air under moderate pressure of approximately
15 psi.
c.
Inspection and Repair.
(1) Visually inspect gearcase for nicks or dents on
the gasket mating surface. Inspect for cracks. Inspect bolt
holes for damaged or excessively worn threads. Replace
gearcase if damaged.
(2) Inspect all components for evidence of
excessive wear, scratches, and nicks. Replace defective
components.
(3) Measure distance from end of roll pin to
mounting face of gearcase. The distance should be
0.781-inch. If necessary to replace pin, the pin should be
positioned with open end facing crankshaft seal.
d.
Assembly (Fig.
7-28).
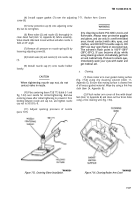
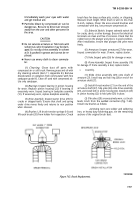
(1) Install thrust bearing (8, fig. 7-28) and ball
(9), and press bearing into position.
7-54
Back to Top

