TM-9-2815-213-34 - Page 32 of 192
*TM 9-2815-213-34
(4)
Lubricate machined packing ring bore of
block with light coat of OE-10 lubricant.
(5)
Start sleeve into bore by hand.
(6)
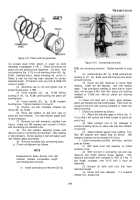
Use a sleeve driver (31,
fig.
B-28) place
sleeve in block.
(7)
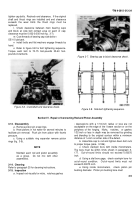
Using a dial bore gage check sleeve
against limits specified in repair and rebuild standards
(para.
3-174).
If specified limits are exceeded remove
sleeve and check for possible
twisted seal rings,
cocked crevice seal or sleeve to block
contact which could cause distortion of sleeve.
If no
apparent cause is evident replace sleeve.
(8)
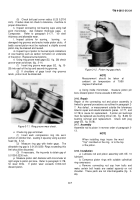
Install sleeve and check sleeve protrusion
using gage block (24,
fig.
B-28) to determine if
protrusion is uniform.
Section III.
3-7.
Disassembly
a.
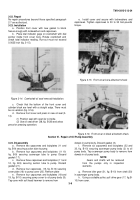
Attach a gear puller to shaft gear.
b
. Using a heating torch head gear hub 300 - 400
degrees Fahrenheit.
c.
Apply 75 to 100 foot pounds torque on puller
screw and remove gear and key.
d.
Remove all pipe plugs.
3-8.
Cleaning
Clean crankshaft and gear in accordance with paragraph
2-5.
3-9.
Inspection
a.
Visually inspect shaft journals for the
lowing
defects.
Replace shaft if all or any defect is present:
(1)
Deep nicks,
grooves,
scratches,
evidence
of galling or scuffing.
(2)
Burned areas,
if color is a very do blue.
(3)
Heavy discoloration throughout shaft from
over-all heating.
b.
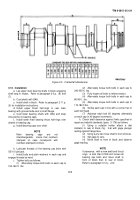
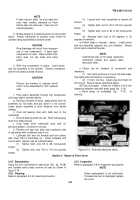
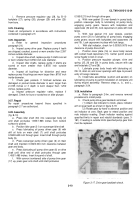
Measure all bearing surfaces with a micrometer
(fig.
3-5).
Check against wear limits specified in repair
and rebuild standards (para
3-174).
c.
Check shaft for out-of-round condition.
Shaft
must be reground or replaced if main beings or journals
are worn out-of-round more than 0.002.inch.
d.
Visually inspect thrust flange at rear main
bearing.
If surface is scored or scratched,
flange must
be reground.
e.
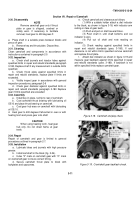
Measure flange wear (P,
fig.
3-5).
NOTE
If flange wear does not exceed 0.003-
inch at any one point,
flange condition is
acceptable.
If wear is 0.003-inch or
more,
flange must be reground to
restore flatness.
3-1 0.
Repair
a. Regrinding Main Bearing and Rod Journal
If out-
of-round or worn beyond repair and rebuild standards
specified limits,
(para.
3-175) main bearing and rod
journals may be ground undersize.
NOTE
Undersize grinding shall be to a limit of
0.010-inch.
If one bearing or journal
requires grinding,
all bearings or
journals shall be ground to the same
undersize dimension.
b. Regrinding Rear Main Bearing
Thrust Flange.
Flange shall be reground to restore flatness to accept
either standard or oversize thrust rings.
NOTE
If total wear and regrinding does not
exceed 0.005-inch,
standard thrust
rings may be used.
Maximum regrinding
for oversize rings shall not exceed
0.005-inch undersize.
c. Minor Defects.
Minor defects on journal and
bearing surfaces may be repaired by polishing with a
crocus cloth dipped in dry-cleaning solvent or mineral
spirits paint thinner.
d. Repair Inspection.
Shaft must be inspected by
the electro magna-flux method for fractures after
refinishing.
If any evidence of cracks are noted,
replace
shaft.
3-11.
Assembly
a.
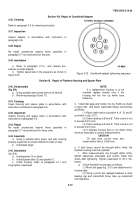
Install all pipe plugs using sealing tape or lead
sealer to prevent leakage.
Refer to para-graph 3-186,
for pipe plug torque specifications.
b.
Install key in shaft keyway.
c.
Oil shaft with OE-10 lubricant.
CAUTION
When using heating torch keep flame
away from direct contact with gear teeth.
d.
Heat gear in oven,
or with heating torch,
to
approximately 400 degrees Fahrenheit.
e.
Using rubber mallet,
or brass head driver,
drive
gear on shaft.
3-3
Back to Top

