TM-9-2320-273-34 - Page 472 of 801
TM 9-2320-273-34
(6)
Insert the pinion and bearing assembly in the pinion cage and position the spacer over the
pinion shaft.
(7)
Press the forward bearing firmly against the spacer.
(8)
Rotate the cage several revolutions to assure normal bearing contact.
(9)
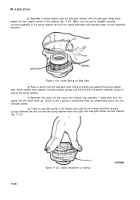
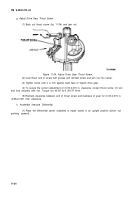
While in the press under pressure, check the bearing preload torque. Wrap a soft wire
around the cage pilot an pull on a horizontal line with a pound scale. (If the press i
S
not equipped with a
pressure gage, the pinion nut may be tightened to the correct torque and the preload checked in a vise).
NOTE
For new pinion bearings, the rotating
torque must be within 5-25 lb-in. For
reused pinion bearings, the rotating
torque must be within 5-15 lb-in.
(10)
If the rotating torque is not within these values, use a thinner spacer to increase, or a thicker
spacer to decrease the preload torque.
The correct pressure and nut torque for checking pinion bearing
preload are as follows:
Required Nut
Required Pressure
Pinion Shaft
Torque to Obtain
To Obtain Correct
Thread Size
Correct Preload
Preload
l-3/4x 12
900-1200 Ib-ft
11-14 tons
(1220-1627 N•m)
(10-12.7 metric tons)
(11)
Insert pinion cage to carrier capscrews and washers in their respective holes in the pinion
cage.
NOTE
If the helical driven gear must be replaced
with a new gear, replace both the drive
and driven gears as a set.
(12)
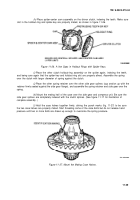
Press the drive pinion helical gear against the forward bearing and install washer and pinion
shaft nut.
(13)
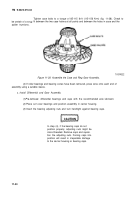
Using a suitable holder on gear, tighten the pinion shaft nut to the required torque.
(14)
Recheck pinion bearing preload torque.
If rotating torque is not within specified values,
repeat the foregoing procedure.
(15)
If the original gears are reused, install the original shim pack. If gears have been replaced,
alter the original shim pack as follows:
Note the variation from the nominal assembly dimension on both
the old and new pinion. (The nominal dimension is stamped and the variation is etched on the nose of the
pinion. ) Increase or reduce the shim pack in accordance with the change in the variation from the old to
the new pinion. After changing the sign of the old variation – plus-to-minus or minus-to-plus – add to the
new variation (sign unchanged).
(16)
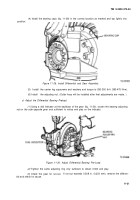
Position the pinion and cage assembly in the carrier pinion cage bore and tap into place with
a soft mallet. Make certain that capscrews are alined with respective holes in carrier, and that cage is not
cocked in its bore.
11-26
Back to Top

