TM-9-2330-356-14
SEMITRAILER, TANK: 5000 GALLON, BULK HAUL, SELF LOAD/UNLOAD M967 AND M967A1; SEMITRAILER, TANK: 5000 GALLON, FUEL DISPENSING, AUTOMOTIVE M969 AND M969A1; SEMITRAILER, TANK: 5000 GALLON, FUEL DISPENSING, UNDER/OVERWING AIRCRAFT M970 AND M970A1
TECHNICAL MANUAL; OPERATOR’S, UNIT, DIRECT SUPPORT, AND GENERAL SUPPORT MAINTENANCE MANUAL
OCTOBER 1990
TM-9-2330-356-14 - Page 347 of 528
TM 9-2330-356-14
d.
Inspection and Repair.
(1)
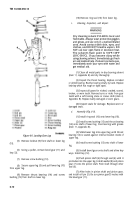
Inspect wedge guide (7) for damage or wear.
If wedge guide is worn more than 25% of its thickness,
replace it.
(2) Check tube on non-pressure housing for pits,
grooves, or stripped threads. Replace housing if damage is
found.
(3) Inspect and replace diaphragm if it is tom or
cracked, or if rubber at sealing edge has become set or
distorted.
(4) Inspect diaphragm plate for bent push rod or
worn or cracked boot. Replace if not serviceable.
e.
Assembly.
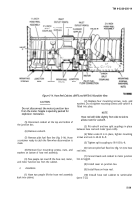
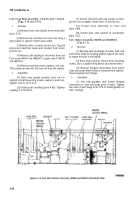
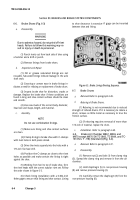
(1) Install wedge guide (7) all the way onto end of
push rod of diaphram plate (6).
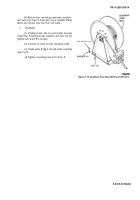
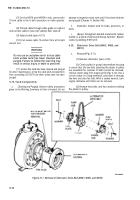
Figure 6-4. Brake Air Chamber (M967, M969,
and M970 except M970 SN TC-0843, TC-0844,
and TC-103 thru TC-178) (Standard).
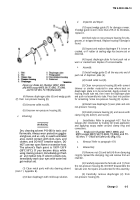
(4) Remove diaphragm plate (6) and wedge guide
(7) from non-presure housing (8).
(5) Unscrew collet nut (9).
(6) Unscrew non-pressure housing (8).
c.
Cleaning.
WARNING
Dry cleaning solvent P-D-680 is toxic and
flammable. Always wear protective goggles
and gloves, end us. only in a well-ventilated
area. Avoid contact with skin, eyes, and
clothes, and DO NOT breathe vapors. DO
NOT use near open flame or excessive heat.
The solvent’s flash point is 100°F-138°F
(38°C-59°C). If you become dizzy while
using cleaning solvent, Immediately get fresh
air
and medical help. If solvent contacts eyes,
immediately wash your eyes with water end
get medical aid.
(1) Clean metal parts with dry cleaning solvent
(item 11, Appendix E).
(2) Clean diaphragm with mild soap solution.
(2)
Install collet nut (9).
(3) Clean non-pressure housing (8) with cement
thinner or similar material in area where boot on
diaphragm plate is to be cemented. Apply cement to
housing around tube end, then insert the diaphragm plate
and push rod assembly into tube. Press boot into position
for cementing. Screw non-pressure housing (8)
in
place.
(4)
Install new diaphragm (5) over plate and onto
non-pressure housing.
(5) Install pressure housing (4), and secure with
clamp ring (3), bolt (1) and nut (2).
f.
Installation.
Refer to paragraph 4-37. Test for
leakage after installation by making full brake application
and applying soapy water around clamp ring and
connections.
6-9.
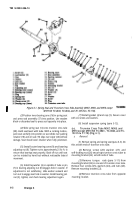
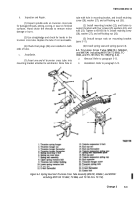
Brake Air Chamber M967, M969, and
M970 except M970 SN TC-0843, TC-0844, and TC-
103 thru T -178) (Fail-Safe Unit) (Fig. 6-5).
a.
Removal.
Refer to paragraph 4-39.
b.
Disassembly.
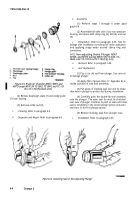
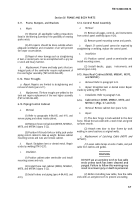
(1) Remove nut (5) and bolt (4) from clamping
ring (6). Spread the clamping ring and remove from air
chamber.
(2) Carefully separate the fait-safe unit (1) from
the non-pressure housing (8). DO NOT disassemble the
fail-safe unit. No repairs are authorized for this assembly.
(3) Carefully remove diaphragm (2) from
non-pressure housing (8).
Change 3
6-5
Back to Top

