TM-9-2330-356-14
SEMITRAILER, TANK: 5000 GALLON, BULK HAUL, SELF LOAD/UNLOAD M967 AND M967A1; SEMITRAILER, TANK: 5000 GALLON, FUEL DISPENSING, AUTOMOTIVE M969 AND M969A1; SEMITRAILER, TANK: 5000 GALLON, FUEL DISPENSING, UNDER/OVERWING AIRCRAFT M970 AND M970A1
TECHNICAL MANUAL; OPERATOR’S, UNIT, DIRECT SUPPORT, AND GENERAL SUPPORT MAINTENANCE MANUAL
OCTOBER 1990
TM-9-2330-356-14 - Page 399 of 528
TM 9-2330-356-14
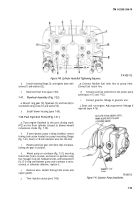
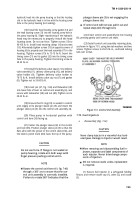
Figure
7-47.
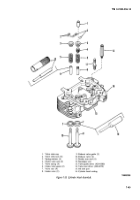
Removing Lower Spring Seat.
TA100118
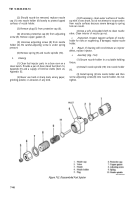
TA100119
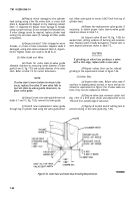
Figure 7-48. Delivety Valve Test Assembly.
NOTE
Always check to ensure that all external
connections are tight and that the nozzle test
stand is in good order.
(b)
Attach test fixture TSE
manually operated Nozzle Test Stand.
76226 (3) to a
(c)
Delivery valve opening pressure is
300-600 psi. Delivery valve must hold 275 psi for 30
seconds. Remove delivery valve assembly from test
fixture. The delivery valve spring (1) must be free of nicks
or wear (flat spots). Replace fuel injection pump if springs
are nicked or worn.
CAUTION
Lapping compound must not come in contact
with the relief piston during the lapping
operation, and all lapping compound must be
removed before installing the delivery valve
assembly into the hydraulic head.
(d)
If the delivery valve assembly is leaky,
the delivery valve seat may be lapped to its corresponding
seat in the delivery valve body with a small quantity of
suitable lapping compound.
(2) If the plunger bottom (23, fig. 7-46) is
grooved, ridged, scored, or exhibits an uneven wear
pattern, it must be replaced.
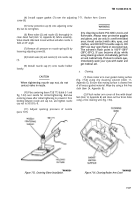
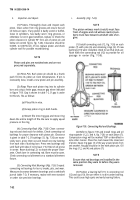
(3) Inspect the tappet (20) for possible wear at
the contact areas. The primary contact areas are the
tappet contact area and the cam contact area (fig. 7-49).
Replace the tappet if wear indentations exceed
0.002-inch. The tappet thickness measured between the
plunger button contact surface and the cam contact area
must be 0.207-inch or larger.
TA100120
Figure 7-49. Inspecting Tappet
(4) The pump housing (6, fig. 7-46) should be
washed in a cleaning solvent. Check all the screw threads
in the housing; damaged threads can be repaired using
thread inserts:
(5) Examine the pump housing for cracks or
other damage which will cause oil leakage. Replace
complete pump if pump housing is damaged.
7-43
Back to Top

