TM-9-2320-283-13-P - Page 152 of 400
0018-50
TM 9-2320-283-13&P
0018
1
2 (001-020-19-30)
(001-020-19-29)
3 (103321)
4
5 (001-020-19-32)
(001-020-19-31)
6
7
8
9 (W323102)
INSTALLATION OF BRACKETS FOR REAR EXTERIOR LIGHTING
NOTE
As an equipment condition, the right and left blackout tail lamps,
stop/tail lamps, and trailer receptacle have been removed to provide
clearance for installation of new spring brake chambers on rear-rear
axle. New mounting brackets are installed after installation of spring
brake chambers. Installation of right and left-hand brackets is the
same. Left-hand brackets are shown.
One star washer shall be installed on center hole between new
stop/tail lamp mounting bracket and truck frame to ensure a good
electrical ground.
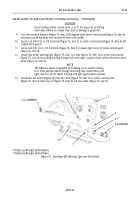
1.
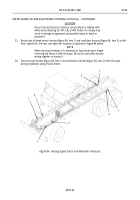
Install new tail light mount (figure 72, item 5) on rear frame section and bracket (figure 72, item 8) with
new star washer (figure 72, item 7), three bolts (figure 72, item 6), and new locknuts
(figure 72, item 9).
2.
Install new blackout light mount (figure 72, item 2) on rear shackle mounting bracket (figure 72, item 1)
with new lockwasher (figure 72, item 3) and screw (figure 72, item 4).
3.
Repeat steps 1 and 2 of installation of right-hand mounting brackets (figure 72, items 2 and 5).
NOTE
It may be necessary to loosen wiring harness clamps and pull trailer
receptacle back to reach new mounting brackets.
Reuse grommets from discarded mounting brackets. Ensure new
lockwashers are used for installation of receptacle and lamps.
4.
Install trailer light receptacle. Refer to TM 9-2320-283-20.
5.
Install stop/tail lamps. Refer to TM 9-2320-283-20.
6.
Install blackout tail lamps. Refer to TM 9-2320-283-20.
Figure 72. Installing Rear Exterior Lighting Brackets.
END OF TASK
Back to Top


