TM-9-2320-283-13-P - Page 168 of 400
TM 9-2320-283-13&P
0019
0019-2
1
2
3
4
5
6
7
8
9
10
REMOVAL - CONTINUED
3.
Position clean, dry drain pan under front hub (figure 2, item 2) and remove six bolts (figure 2, item 10),
lockwashers (figure 2, item 9), cap (figure 2, item 8), and gasket (figure 2, item 7) from front hub
(figure 2, item 2). Discard gasket (figure 2, item 7) and lockwashers (figure 2, item 9).
4.
Remove cotter pin (figure 2, item 6), slotted nut (figure 2, item 5), and key washer (figure 2, item 4)
from spindle (figure 2, item 1). Discard cotter pin (figure 2, item 6).
5.
Remove outer bearing cone (figure 2, item 3) and front hub (figure 2, item 2) from spindle
(figure 2, item 1).
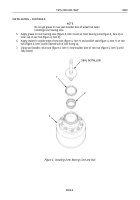
Figure 2. Removing Front Hub.
6.
Using suitable drift and hammer, remove seal (figure 3, item 3) and inner bearing cone (figure 3, item 2)
from front hub (figure 3, item 1). Discard seal (figure 3, item 3).
CAUTION
Ensure tone ring is removed from hub prior to removal of wheel
studs or inner and outer bearing cones from hub. Failure to comply
may result in damage to tone ring.
NOTE
Perform steps 7 through 9 to replace wheel studs. Perform steps 7
and 10 to replace inner and outer bearing cups.
Only remove and replace damaged wheel studs from hub. Do not
reuse removed wheel studs.
7.
Remove front tone ring (figure 3, item 4) from front hub (figure 3, item 1). Refer to WP 0021.
8.
Using suitable press or hammer, drive wheel stud (figure 3, item 5) from front hub (figure 3, item 1).
9.
Repeat step 8 to remove remaining wheel studs (figure 3, item 5) as necessary.
10.
Remove inner and outer bearing cups. Refer to TM 9-2320-283-20.
Back to Top

